Recording Various Information in: ini-file


-
dfiles.euDownload
And once again, this time, not just one technical cleo-script, but a whole pack of technical cleo-scripts for both beginner and experienced scripters.
And not only for them, but also a bit for mappers.
Because what this pack of technical cleo-scripts will do will be useful not only for scripters but also for mappers.
This time, it will not be just another one of my technical cleo-scripts about displaying certain information on the screen.
Instead, it will be, almost, on a closely related topic, as I mentioned above: a whole pack of technical cleo-scripts.
This is the first time I am creating a technical cleo-script on the topic, or rather, this time: a whole pack of technical cleo-scripts.
Specifically, on the topic of recording information into: ini-file, particularly game information.
And specifically this time, it will be various information about the player and everything and everyone surrounding them, namely: peds, vehicles, and even objects.
That is, now all that information, which is somehow related to the player, will be recorded into: ini-file.
After which, such information that has already been recorded into: ini-file, and not just displayed on the screen, can be copied and pasted wherever needed.
Thus saving time on unnecessary manual recording of information that was just displayed on the screen.
---------------------------------------
Now, let's go into more detail about what will be recorded, where, when, and for whom among modders it will be useful.
So, first, about what will be recorded:
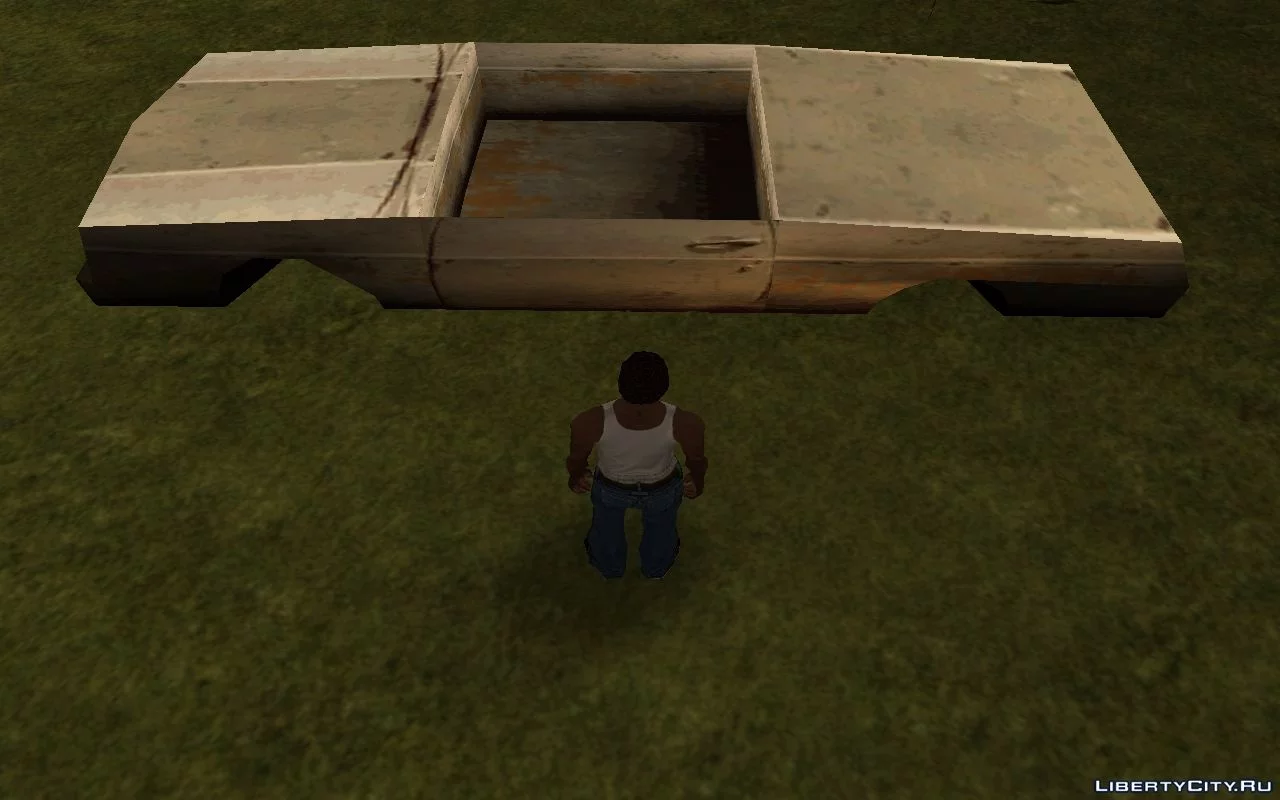
-Coordinates and rotation angle: of the player, ped, vehicle, and object.
-Zone name, number, and name of the current interior where the player is located.
-Health amount: of the player, ped, vehicle, and object.
-Armor amount + maximum armor amount, level + maximum wanted level of the player.
-Current: weapon number, weapon group number, amount of ammunition: for the player and ped.
-Ped type of the ped.
-ID numbers: of peds and their weapons, vehicles, and objects with the player.
-Model name, type, color numbers, current number of passengers, and maximum passenger capacity of the vehicle.
-Masses: of the vehicle and object.
-Mass of the object's rotation.
---------------------------------------
Now about where, when, and for whom among modders most of the above-mentioned will be useful or needed.
---------------------------------------
Scripters:
---------------------------------------
-Now there will be no need to launch any coordinate editor to find out the coordinates and rotation angle of the player.
-To then copy and paste them into opcodes, for example: creating, placing, and setting the rotation angle of: peds, vehicles, or objects.
-Since now they are constantly recorded into: ini-file.
---------------------------------------
-Also, there will be no need to dig through the Sanny Builder documentation to find out the name of the zone where the player is located based on coordinates.
-To then copy and paste it into opcodes, for example: checking if the player is in a certain zone, assigning a zone, etc.
-Since now it is also constantly recorded into: ini-file.
---------------------------------------
-Now there will be no need to search through the Sanny Builder documentation for the interior number or remember it if it was displayed on the screen.
-To then remember or copy and paste it into opcodes, for example: selecting an interior or placing in an interior: peds, vehicles, or objects.
-Since it is also now constantly recorded into: ini-file.
Due to this, there will be no need for either my or another author's technical cleo-script on the topic of displaying the current interior number on the screen.
---------------------------------------
-Also, now there will be no need to search through the Sanny Builder documentation for the current: weapon number, weapon group number, and ID number of the player's weapon.
-Since now they are also constantly recorded into: ini-file.
-This will be great for those scripters who will give the same weapon to peds in their script, for example, the same regular pistol.
---------------------------------------
-Also, now there will be no need to dig through: Ped Editor, looking for the ID number of a favorite ped in the game or its ped type.
-To then copy and paste its ID number or ped type into opcodes: creating a ped, or set the same ped type to a completely different created ped.
-For example, to give it the same behavior and traits as: a woman or if it's a woman, then like a man, for example: walk, character, reaction, etc.
-Since now they are also constantly recorded into: ini-file.
---------------------------------------
-And finally, now there will be no need to search in: GTA Garage Mod Manager for the ID number or model name of a favorite vehicle.
-To then copy and paste its ID number or model name into opcodes, for example: creating a vehicle, creating a vehicle generator, etc.
-Since now they are also constantly recorded into: ini-file.
---------------------------------------
-All other recorded information not listed here is mostly informative.
-And it is unlikely to be useful for copying.
---------------------------------------
Mappers:
---------------------------------------
-Now there will be no need to scroll through IDE catalogs or scour a certain piece of the map in: MEd, looking for a favorite object in the game.
-To then place it on the map.
-Since now (provided that the object is dynamic), its ID number is constantly recorded into: ini-file.
-This will be great for beginner mappers who urgently want to add or remove a favorite or unfavorite object in the game. -For example, these could be: scattered cardboard boxes all over: Grove Street, some small light sources, vending machines, etc.
---------------------------------------
-All other recorded information not listed here is mostly informative.
-And it is unlikely to be useful for copying.
---------------------------------------
Advantages and differences from programs:
-Providing the most information about vehicles and objects.
-Which will never be provided by the aforementioned programs for working with vehicles and objects.
-And the most important advantage is the ability to copy information.
-Which is absent in all the aforementioned programs except: Sanny Builder.
---------------------------------------
Advantages and differences from other similar scripts that also record information about peds:
-Information is recorded about two peds, not just one, located near the player.
-About one that is near the player and another that the player is aiming at.
-That is, effectively, two peds are caught with one aim.
---------------------------------------
This pack of technical cleo-scripts was made as an alternative to an old, non-working cleo-script for some or even most.
Specifically this one: "Displaying Various Information on Screen".
It does not work for me personally.
Since I am not good at working with: text draw, I did not try to fix it or create a similar script based on it.
Instead, I decided to make a remake of it in the form of another possible working variant of the script and an alternative to the script itself.
Which I managed to do with a bit of effort.
Control keys and your actions:
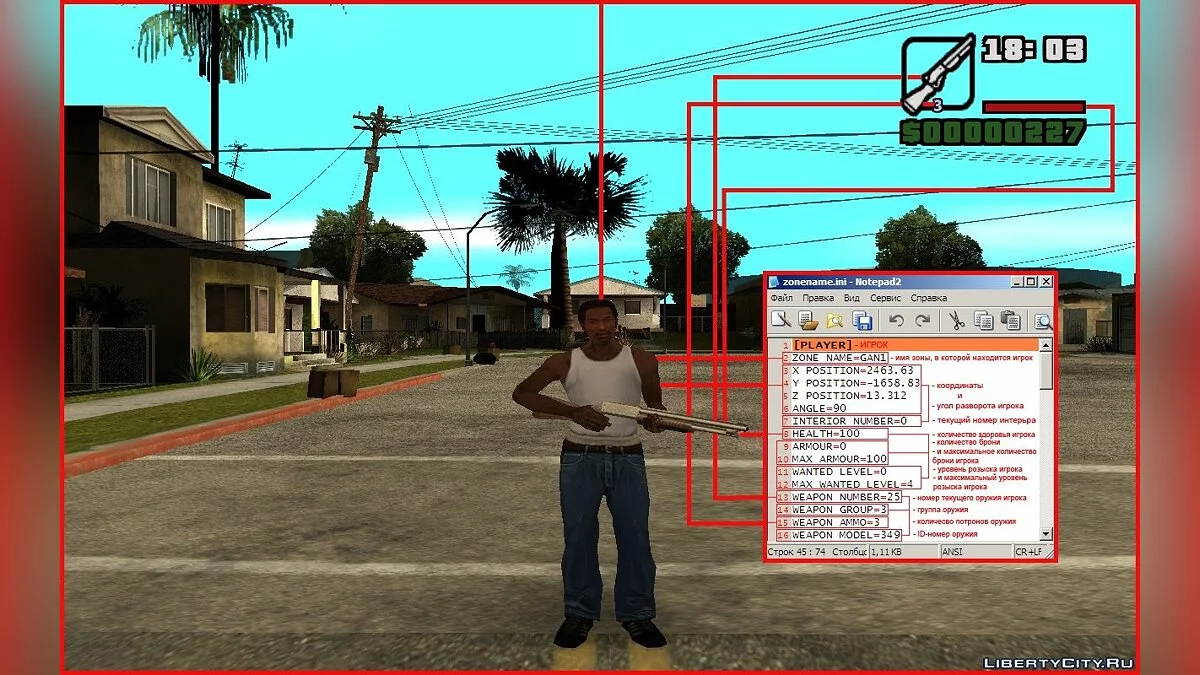
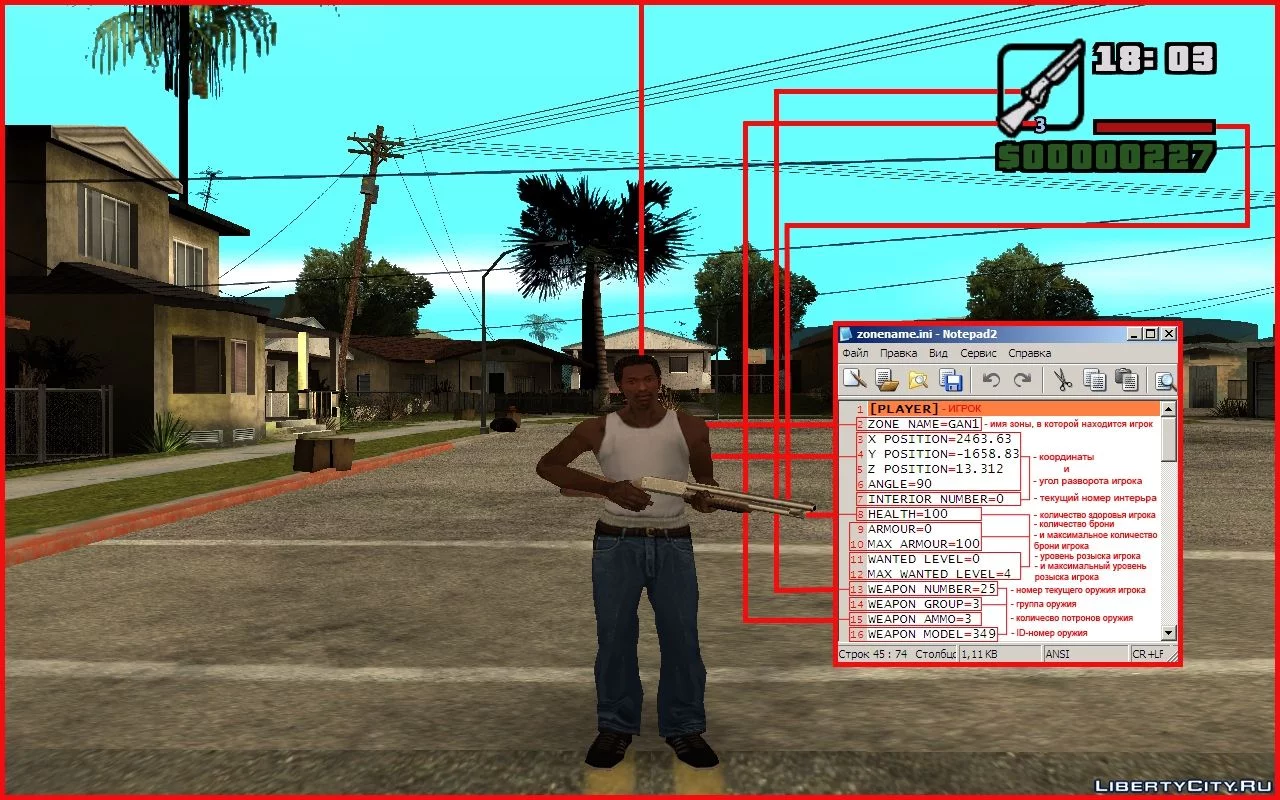
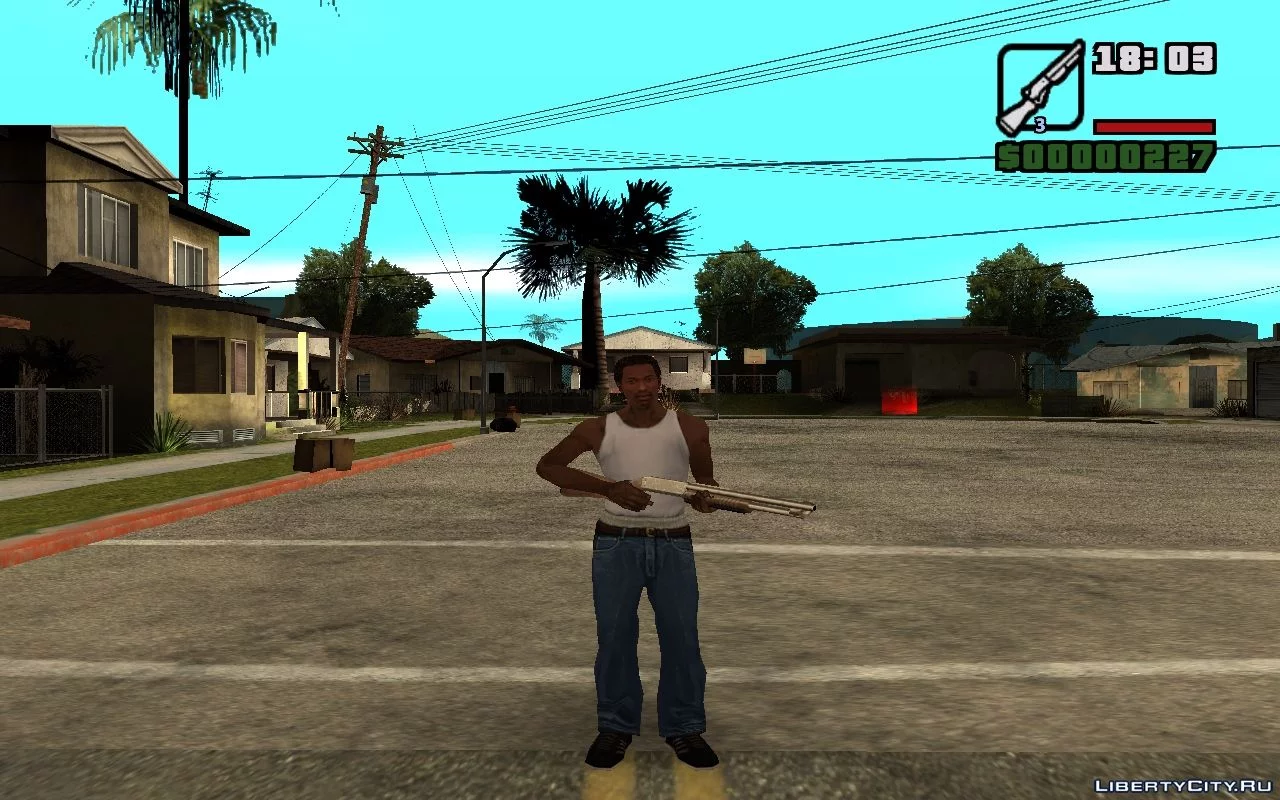
01. If you need to get information about the player, no key presses or actions are required from you.
02. Just wait about 5 seconds, minimize the game.
03. Open the folder: cleo.
04. Open the file: zonename.ini.
05. Go to the very top section, the section: [PLAYER].
06. Select the cell you need in the section.
07. For example: ZONE NAME=GAN1, where: ZONE NAME= - is the: ZONE NAME, and: GAN1 - is the name of the current zone where the player is or was located.
---------------------------------------
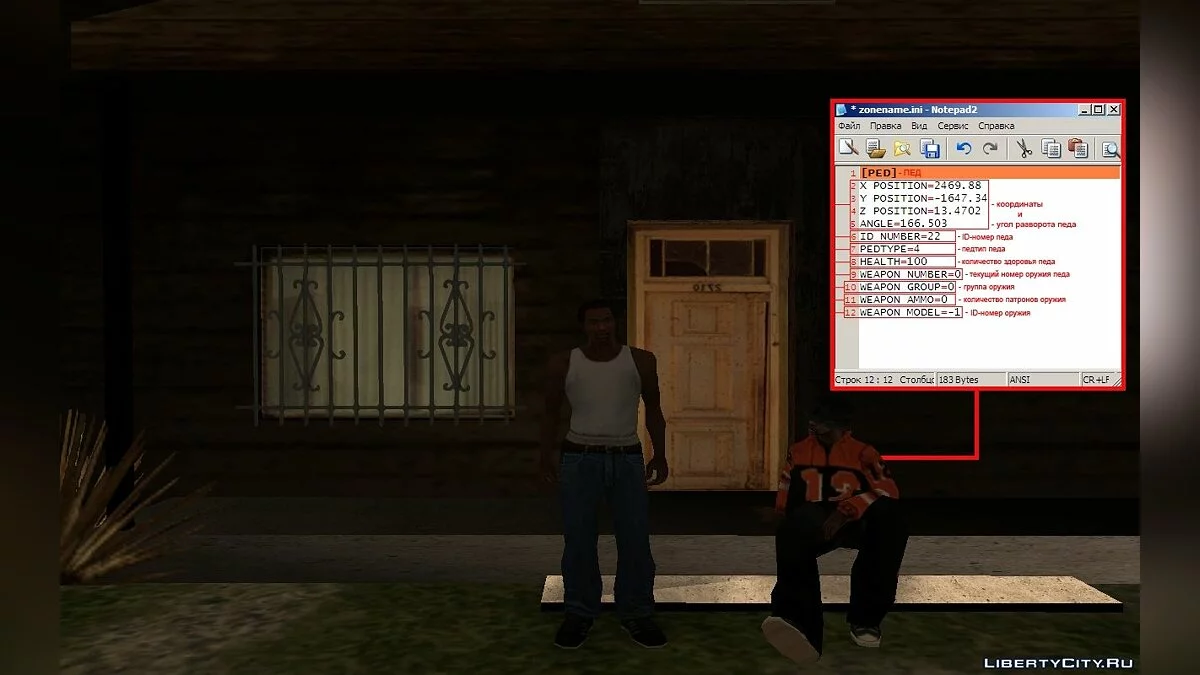
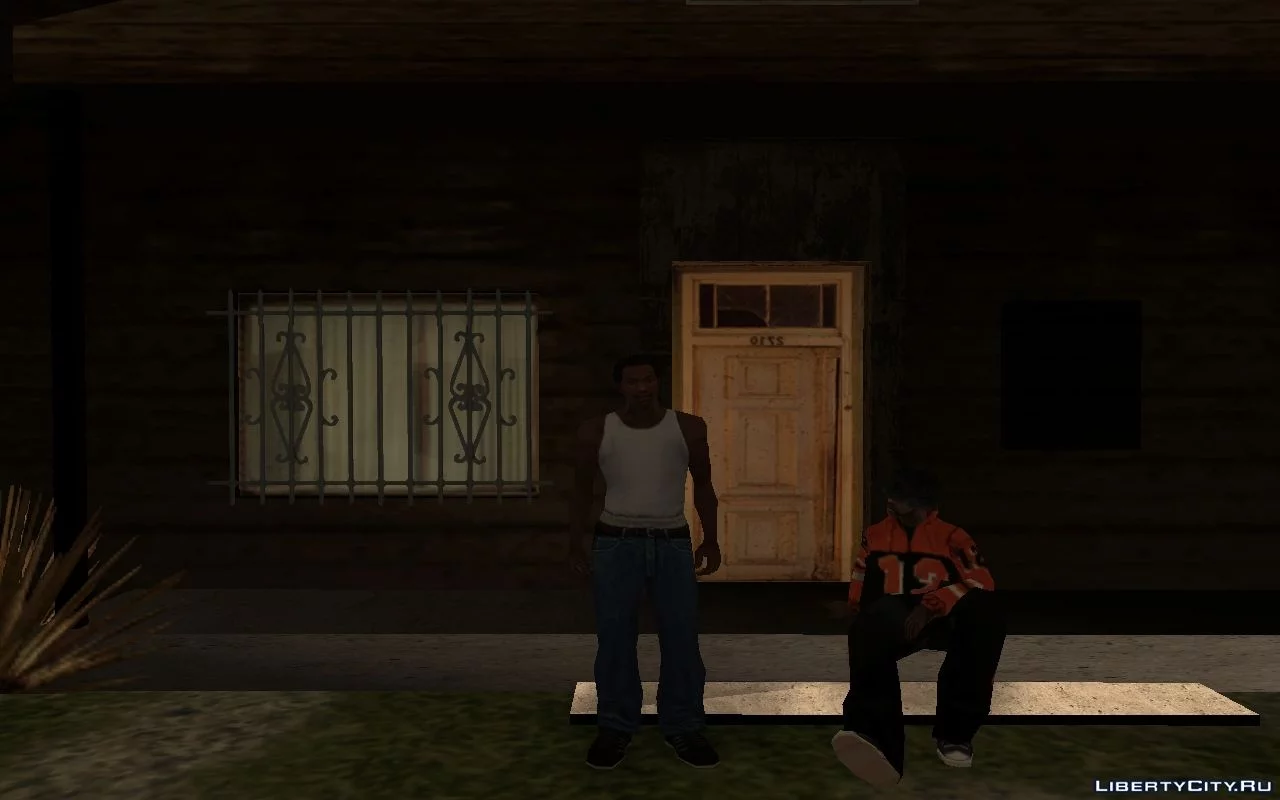
08. If you need to get information about some ped that is near the player, then.
09. Approach this ped or make sure that you are not too far from it.
10. Wait about 5 seconds and minimize the game.
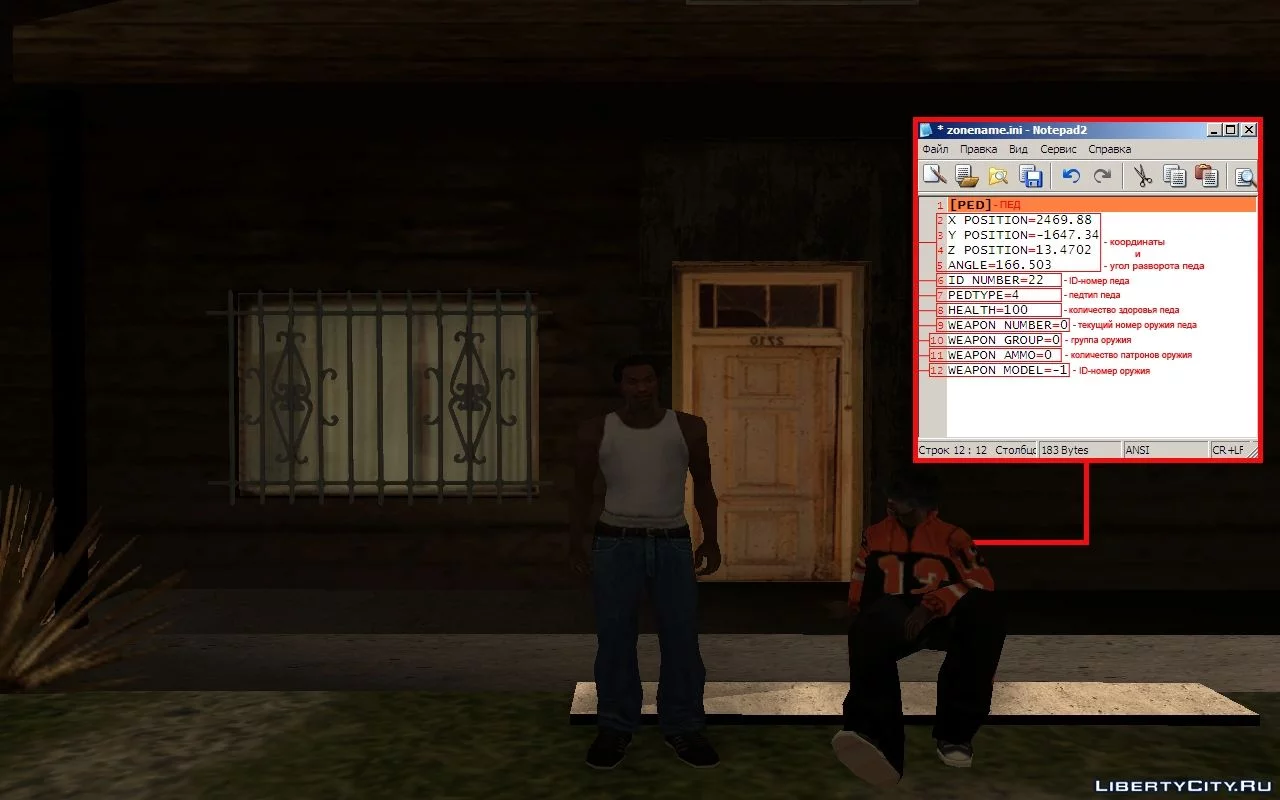
11. Also open the folder: cleo.
12. And also open the file: zonename.ini.
13. Go to the second section, the section: [PED].
14. Select the cell you need in the section.
15. For example: ID NUMBER=22, where: ID NUMBER= - is the: ID NUMBER, and: 22 - is the ID number of the ped next to which the player is or was located.
---------------------------------------
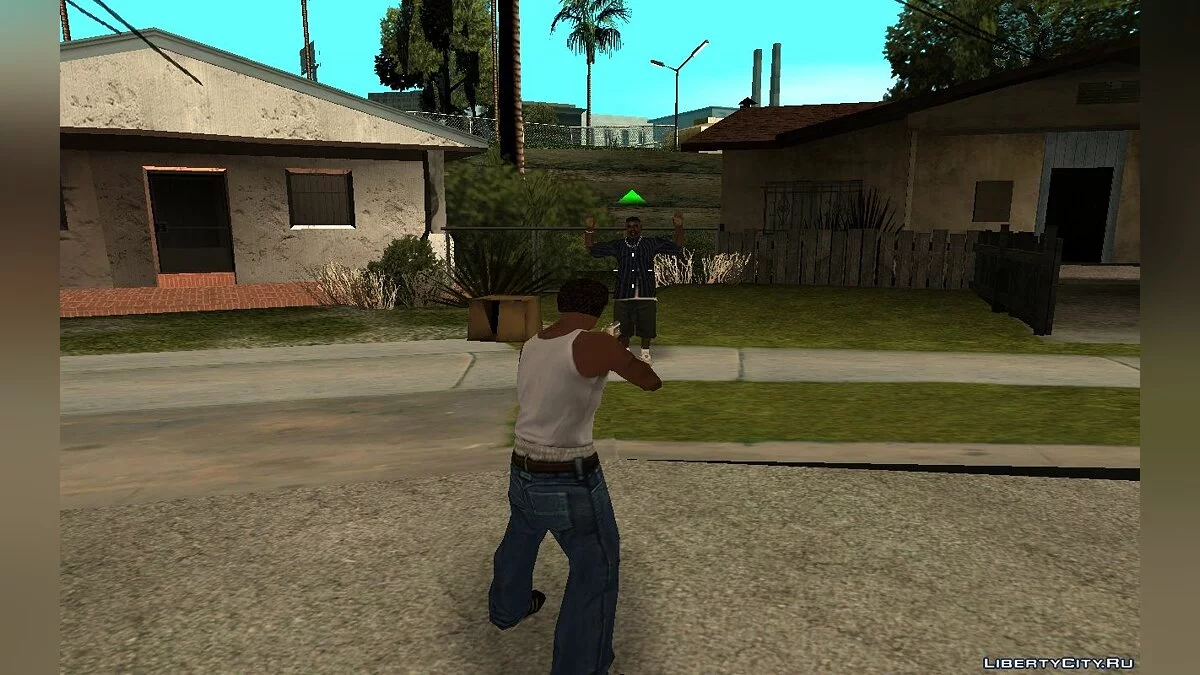
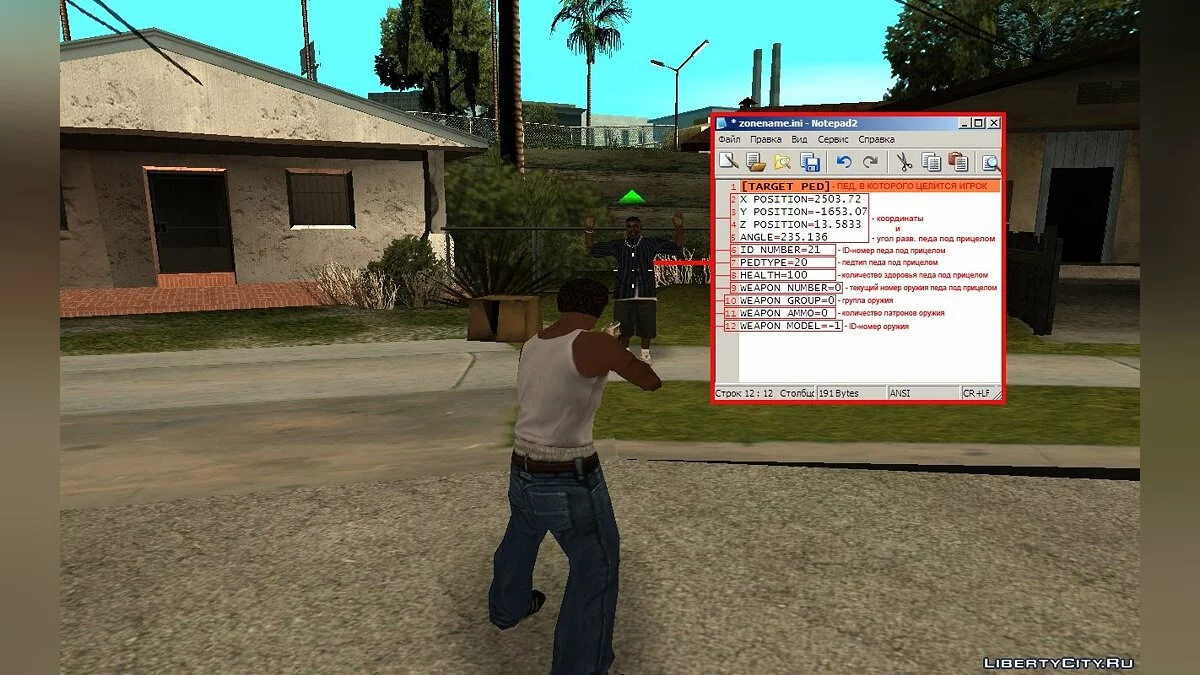
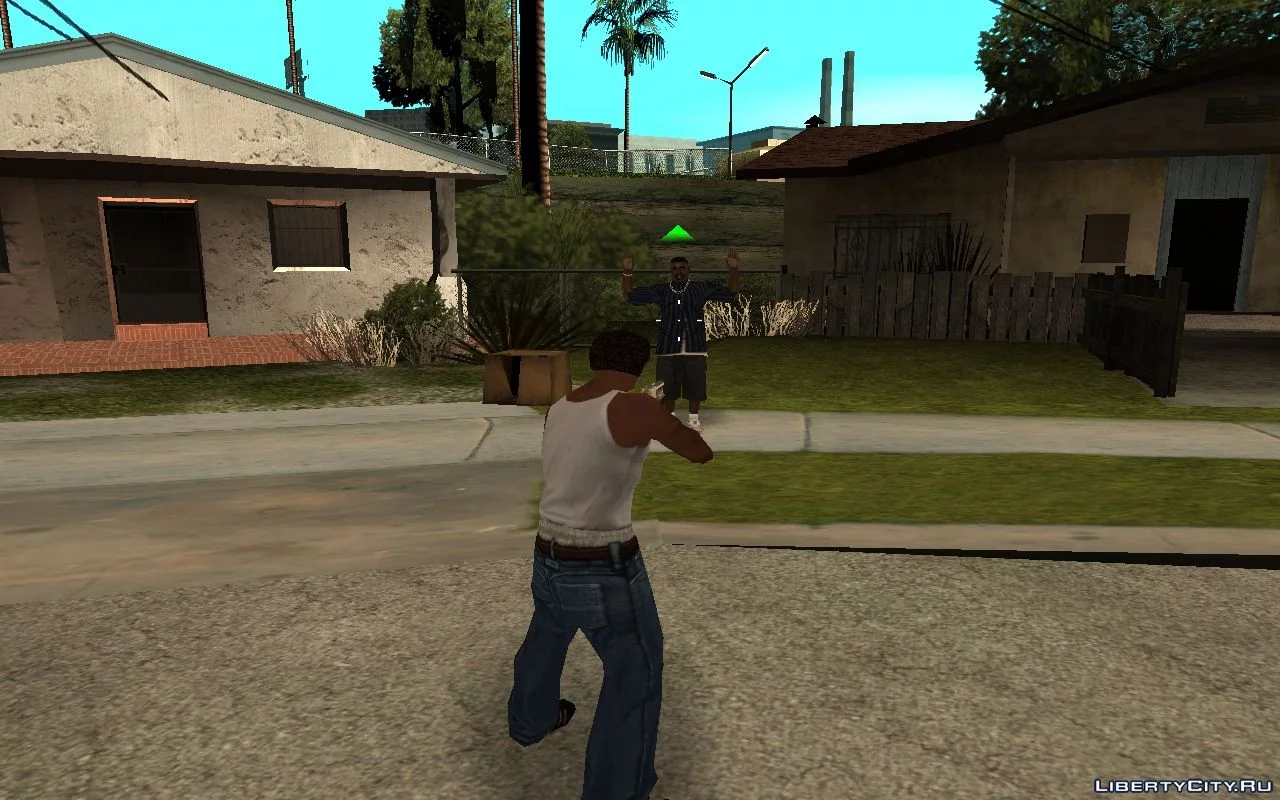
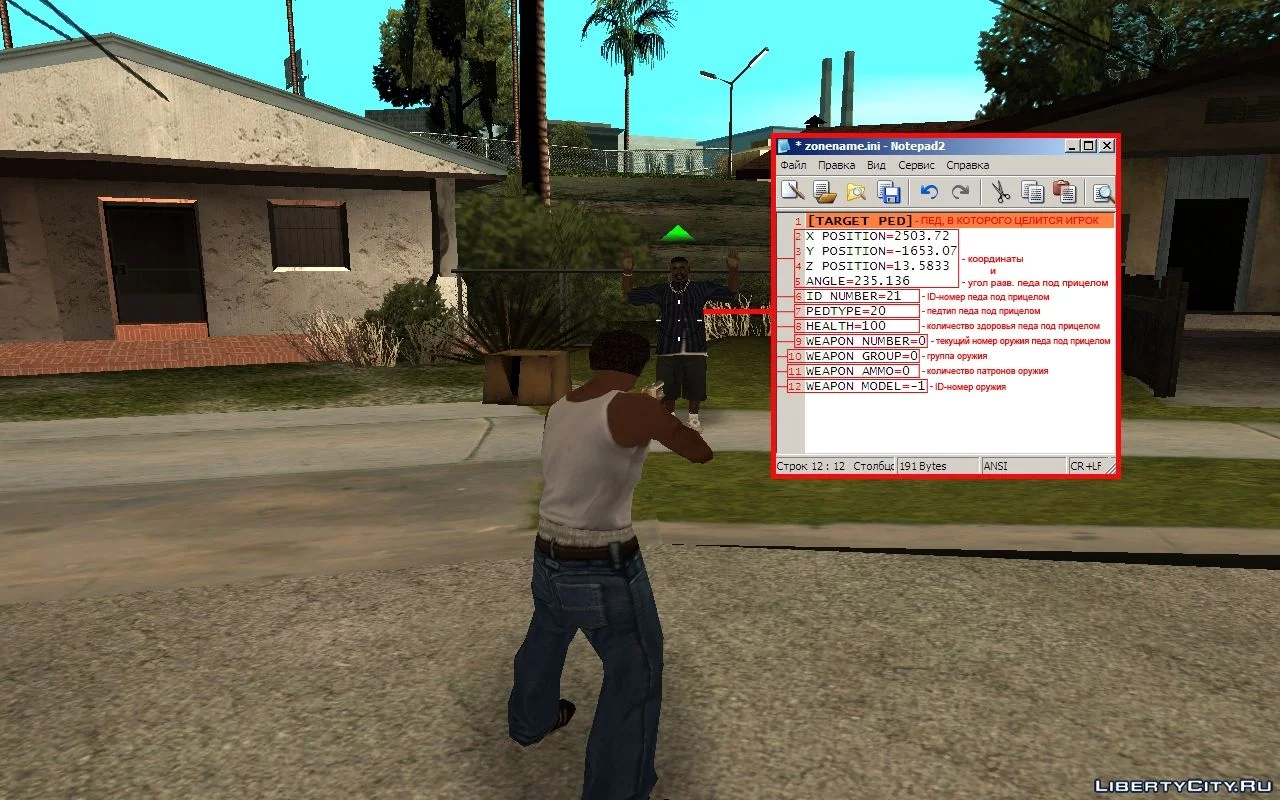
16. If you need to get information about a specific ped that is either near the player or far enough from the player, then.
17. Aim at the desired ped by pressing: RMB.
18. Wait while keeping the ped in your sights for about 5 seconds and minimize the game.
19. Also open the folder: cleo.
20. And also open the file: zonename.ini.
21. Go to the third section, the section: [TARGET PED].
22. Select the cell you need in the section.
23. For example: PEDTYPE=20, where: PEDTYPE= - is the: PED TYPE, and: 20 - is the number of the ped type of the ped that the player is aiming at or aimed at.
---------------------------------------
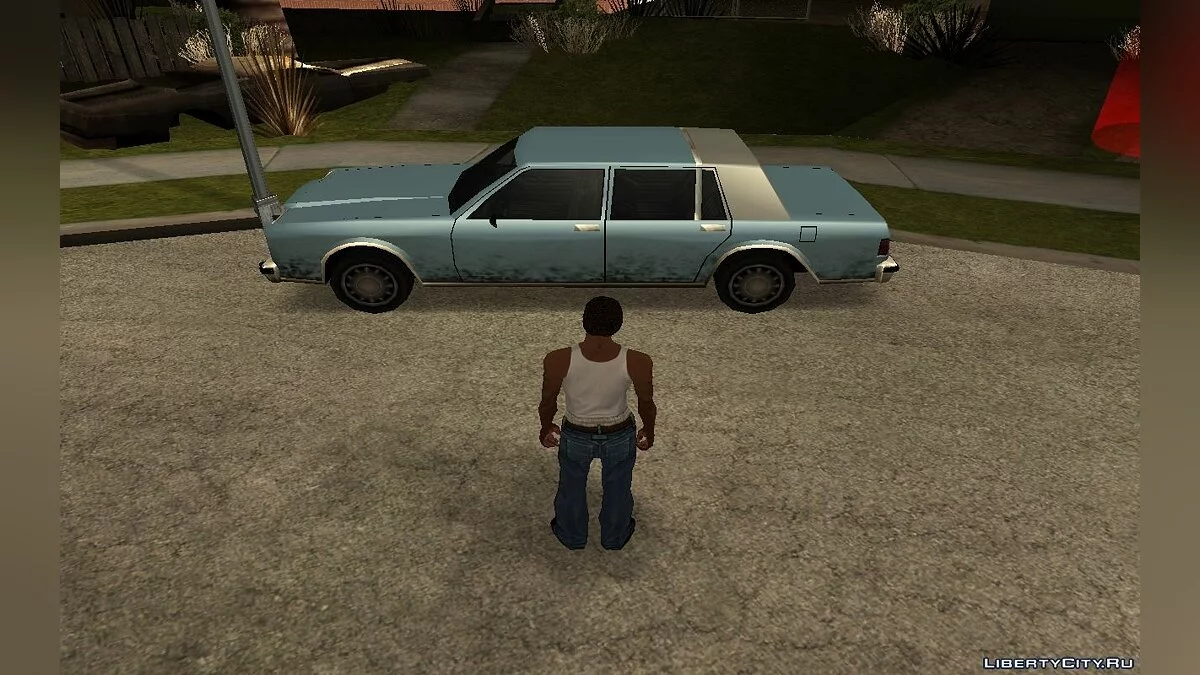
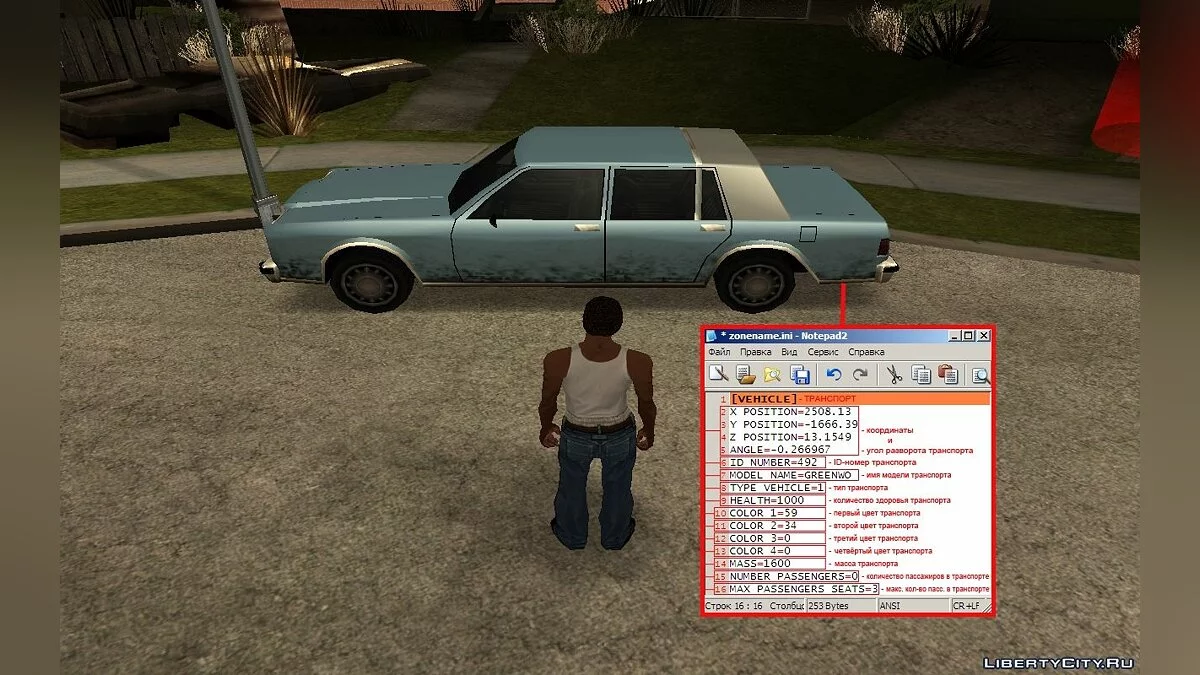
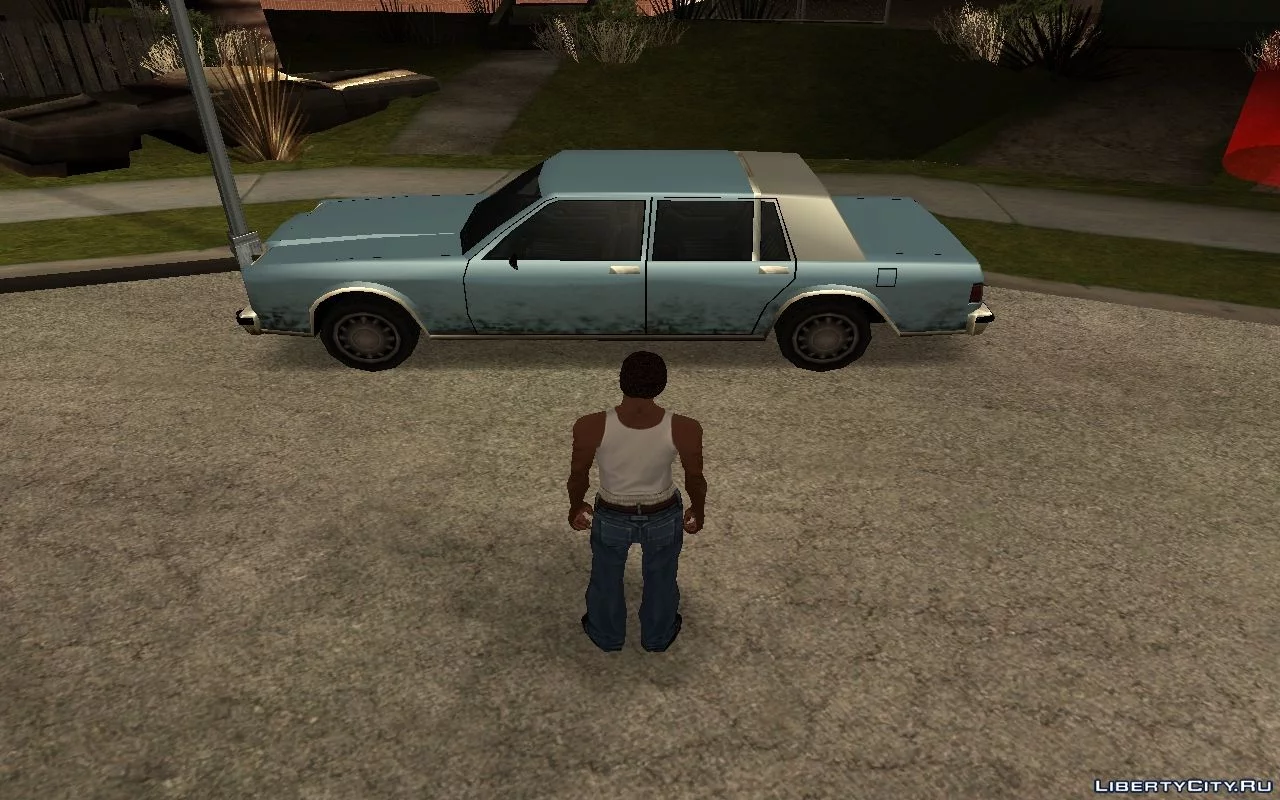
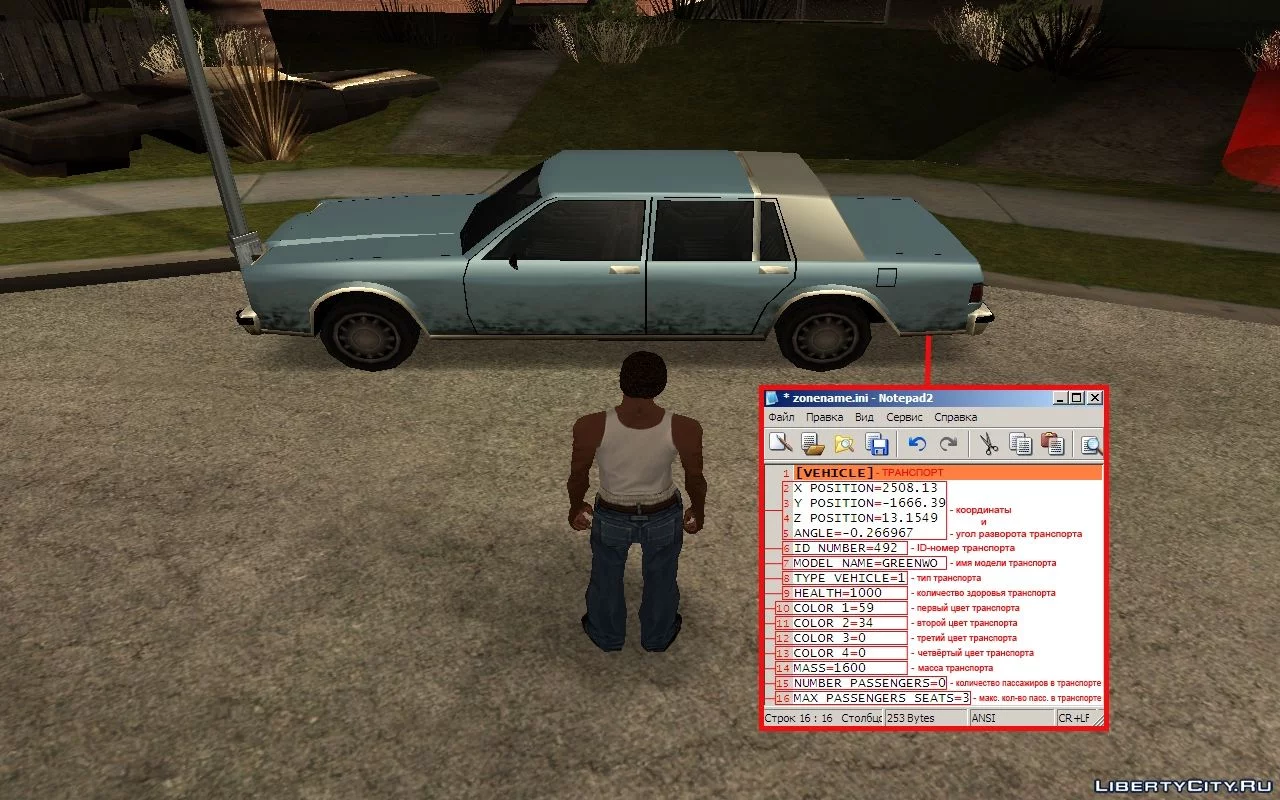
24. If you need to get information about any vehicle that is near or not far from the player, then.
25. Approach this vehicle or make sure that you are not too far from it.
26. Wait about 5 seconds and minimize the game.
27. Also open the folder: cleo.
28. And also open the file: zonename.ini.
29. Go to the fourth section, the section: [VEHICLE].
30. Select the cell you need in the section.
31. For example: MODEL NAME=GREENWO, where: MODEL NAME= - is the: MODEL NAME, and: GREENWO - is the name of the vehicle model next to which the player is located.
---------------------------------------
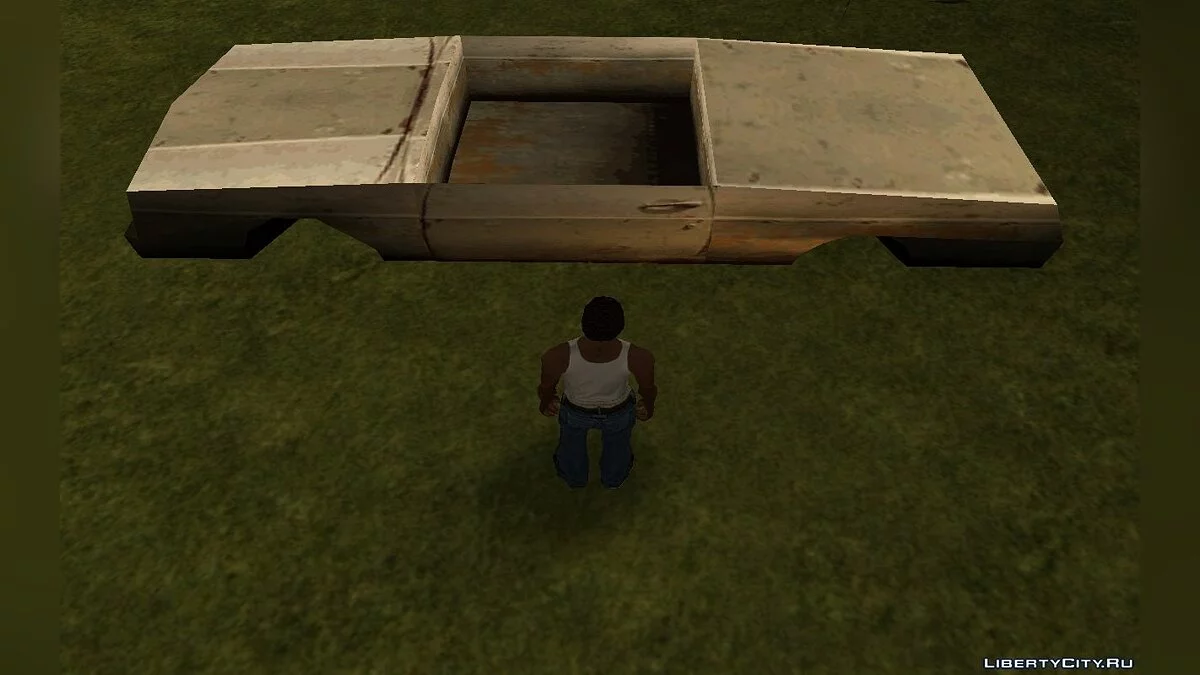
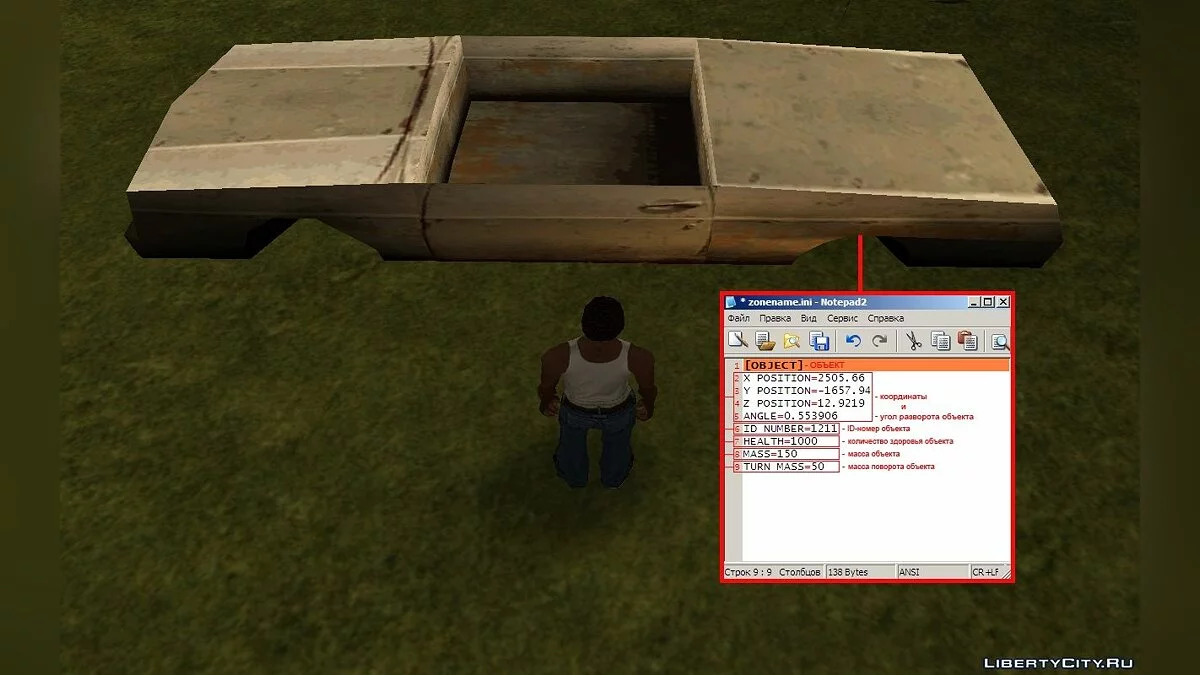
32. If you need to get information about any object that is near or not far from the player, then.
33. Approach this object or make sure that you are not too far from it.
34. Wait about 5 seconds and minimize the game.
35. Also open the folder: cleo.
36. And also open the file: zonename.ini.
37. Go to the fifth section, the section: [OBJECT].
38. Select the cell you need in the section.
39. For example: MASS=150, where: MASS= - is the: MASS, and: 150 - is the mass of the object.
---------------------------------------
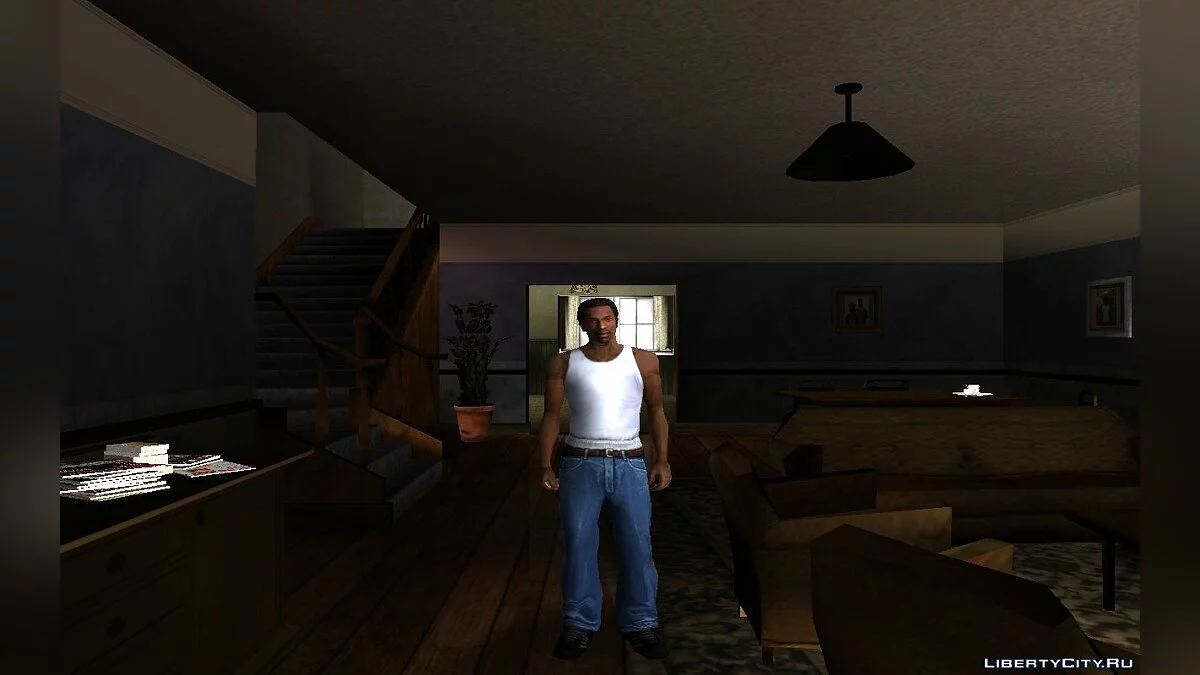
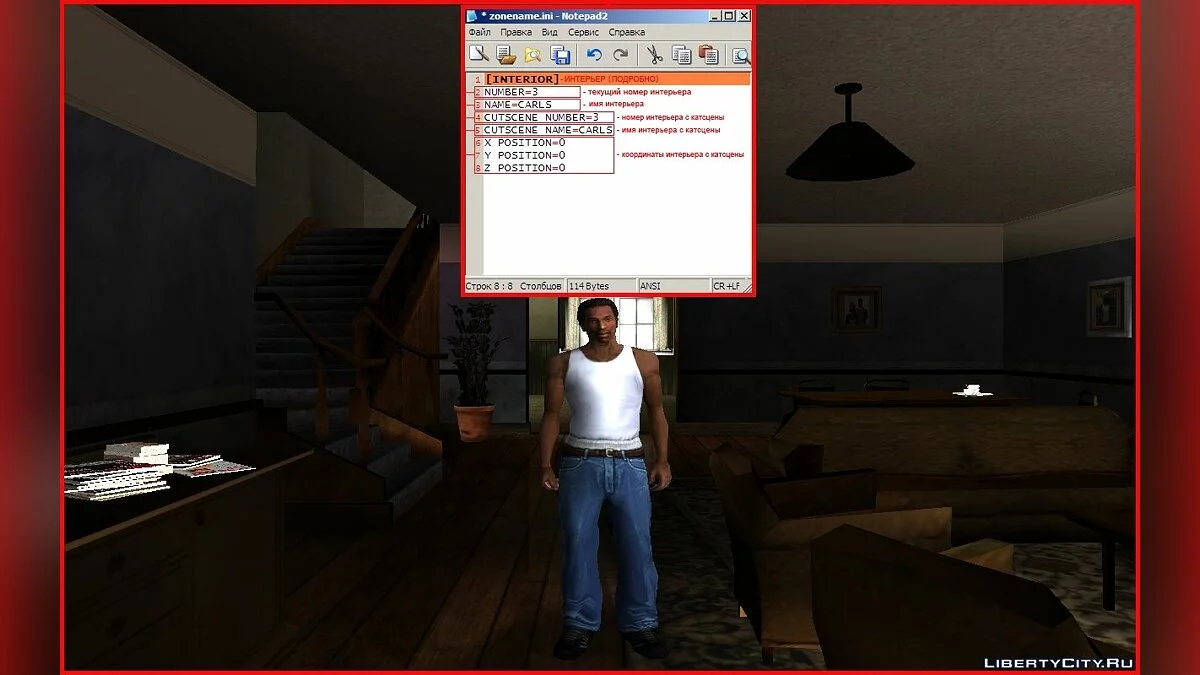
40. If you need to get more detailed information about the interior where the player is currently located, then.
41. Enter any room, for example, the player's house on: Grove Street.
42. Wait about 5 seconds and minimize the game.
43. Also open the folder: cleo.
44. And also open the file: zonename.ini.
45. Go to the last section, the lowest section, the section: [INTERIOR].
46. Select the cell you need in the section.
47. For example: NAME=CARLS, where: NAME= - is the: NAME, and: CARLS - is the name of the interior.
48. All other information about all other cells in the sections is detailed in the screenshots.
=======================================
Control keys and your actions, additionally: (if desired, if needed)
01. If you need to get specifically the model name: of a ped, object, weapon of the player or ped, it won't be a big deal.
02. Just, all you need to do is launch: Sanny Builder, click on "Create File".
03. And in the very first line, write or paste the copied: ID number of the ped, object, or weapon of the player or ped.
04. After that, highlight it and press: Ctrl+Alt+H and the model name will immediately display replacing its ID number.
И ещё, и на этот раз, даже не один, технический cleo-скрипт, а целый пак технических cleo-скриптов для начинающих и не начинающих скриптеров.
И не только, для них, но и ещё и немного, для маперов.
Потому что, то что будет делать этот пак технических cleo-скриптов, будет полезно, не только скриптерам, но и маперарам тоже.
И на этот раз, это уже будет не очередной мой технический cleo-скрипт, на тему отображения определённой информации о чём либо на экране.
А будет, почти, на близкую по смыслу этой теме, тему, как я уже писал выше: целый пак технических cleo-скриптов.
На тему, на которую, я впервые делаю технический cleo-скрипт, а точнее, в этот раз: целый пак технических cleo-скриптов.
А именно, на тему: записи информации в: ini-файл, а конкретно игровой информации.
И конкретно в этот раз, это будет различная информация об игроке и обо всём и что и кто его окружает, а именно, о: педах, транспорте и даже об объектах.
То есть, теперь вся та или иная информация, которая так или иначе связанна с игроком, будет записываться в: ini-файл.
После чего, такую информацию, которая уже записалась в: ini-файл, а не просто отобразилась на экране, можно уже будет скопировать и вставить куда нужно.
Тем самым сэкономя время, на не нужную его затрату на записи вручную той или иной информации, которая запомнилась, только что отобразившись на экране.
---------------------------------------
Ну, а теперь по подробней о том, что будет записываться и где и когда и кому из модмейкеров, это пригодится.
Итак, вначале, о том что же будет записываться:
-Координаты и угол разворота: игрока, педа, транспорта и объекта.
-Имя зоны, номер и имя текущего интерьера, в которых находится игрок.
-Количество здоровья: игрока, педа, транспорта и объекта.
-Количество + максимальное количество брони, уровень + максимальный уровень розыска игрока.
-Текущие: номер оружия, номер группы оружия, количество патронов оружия: игрока и педа.
-Педтип педа.
-ID-номера: педов и их c игроком оружия, транспорта и объекта.
-Имя модели, тип, номера цвета, текущее количество пассажиров и максимальная вместимость пассажиров транспорта.
-Массы: транспорта и объекта.
-Масса разворота объекта.
---------------------------------------
А теперь о том где и когда и кому из модмейкеров, большинство из всего этого, вышеперечисленного пригодится или будет нужно.
---------------------------------------
Скриптерам:
---------------------------------------
-Теперь больше не придётся запускать тот или иной редактор координат, для того, что бы узнать координаты и угол разворота игрока.
-Чтобы, потом скопировать и вставить их в опкоды, например: создания, помещения и установки угла разворота: педов, транспорта или объекта.
-Так как, теперь они постоянно записываются в: ini-файл.
---------------------------------------
-А также больше не придётся и рыться в справке по: Sanny Builder, что бы примерно по координатам узнать то или иное имя зоны в которой находится игрок.
-Чтобы, потом, скопировать и вставить его в опкоды, например: проверки на нахождение игрока в той или иной зоне, назначения зоны и т.д и т.п.
-Так как, теперь оно тоже постоянно записывается в: ini-файл.
---------------------------------------
-Также теперь и не придётся рыться в справке по: Sanny Builder, и в поисках номера интерьера или же запоминать его, если он отобразился на экране.
-Чтобы, потом запомнить или скопировать и вставить его в опкоды, например: выбора интерьера или помещения в интерьер: педов, транспорта или же объекта.
-Так как, он тоже, теперь постоянно записывается в: ini-файл.
-В связи с этим, больше и не понадобятся: не мой, не другого автора технический cleo-скрипт на тему отображения номера текущего интерьера на экране.
---------------------------------------
-Также теперь, больше не придётся рыться в правке по: Sanny Builder, в поисках текущих: номера оружия, номера группы оружия и ID-номера оружия игрока.
-Так как, теперь они тоже постоянно записываются в: ini-файл.
-Отлично подойдёт тем скриптерам, которые будут давать в своём скрипте, педам одно и тоже оружие, например тот же самый, обычный пистолет.
---------------------------------------
-Также теперь больше не придётся рыться в: Ped Editor, в поисках ID-номера понравившегося педа в игре или его педтипа.
-Чтобы, потом, скопировать и вставить его ID-номер или педтип в опкоды: создания педа, либо установить такой же педтип совсем другому создаваемому педу.
-Например чтобы установить ему такое же поведение и повадки как у: женщины или если женщине, то как мужчине, например: походка, характер, реакция и т.д.
-Так как, теперь они тоже постоянно записываются в: ini-файл.
---------------------------------------
-И наконец, теперь больше не придётся рыться и в: GTA Garage Mod Manager, в поисках ID-номера или же имени модели понравившегося транспортного средства.
-Чтобы, потом, скопировать и вставить его ID-номер или имя модели в опкоды, например: создания транспорта, создания генератора транспорта и т.д, и т.п.
-Так как, теперь они тоже постоянно записываются в: ini-файл.
---------------------------------------
-Вся остальная, записываемая информация не перечисленная тут, для чего нужна, является больше всего информером.
-И скорее всего вряд ли пригодится для копирования.
---------------------------------------
Маперам:
---------------------------------------
-Теперь больше не придётся долго листать каталоги IDE или прочёсывать тот или иной кусок карты в: MEd, в поисках понравившийся объекта в игре.
-Что бы потом установить его на карту.
-Так как, теперь (при условии, что объект динамический), его ID-номер постоянно записываться в: ini-файл.
-Отлично подойдёт начинающим маперам, которым срочно захотелось добавить или убрать тот или иной понравившийся или не понравившийся объект в игре. -Например это могут быть: разбросанные картонные коробки по всему: Гроув Стрит, некоторые небольшие источники освещения, автоматы с напитками и в.т.д.
---------------------------------------
-Вся остальная, записываемая информация не перечисленная тут, для чего нужна, является больше всего информером.
-И скорее всего вряд ли пригодится для копирования.
---------------------------------------
Преимущества и отличия от программ:
-Предоставление наибольшей информации о транспорте и объекте.
-Что никогда не предоставят вышеперечисленные программы для работы с транспортом и объектом.
-И самое главное преимущество - это возможность копирования информации.
-Что отсутствует во всех вышеперечисленных программах кроме: Sanny Builder.
---------------------------------------
Преимущества и отличия от других подобных скриптов, которые тоже записывают информацию о педе:
-Записывается информация сразу о двух, а не об одном педе находящимся рядом с игроком.
-Обо одном что находится рядом с игроком и о другом, в которого целится игрок.
-То есть фактический на один прицел, ловятся сразу два педа.
---------------------------------------
Данный пак технических cleo-скриптов, делался как альтернатива, одному старому, у некоторых или даже у большинства, не работающему cleo-скрипту.
А именно этому: "Вывод различной информации на экран".
У меня он лично не работает.
Так я плохо умею работать с: text draw, я не стал пытаться исправить его или создать на его основе такой же только свой скрипт.
А решил просто сделать на него, что типа ремейка в виде другого, возможного, рабочего варианта скрипта и альтернативы самому скрипту.
Что мне с небольшим, но трудом и удалось.
Клавиши управления и ваши действия:
01.Если вам нужно получить информацию об игроке, то никаких нажатий клавиш и действий от вас не требуется.
02.Просто подождав примерно 5 секунд, сверните игру.
03.Откройте папку: cleo.
04.Откройте файл: zonename.ini.
05.Перейдите в самую верхнюю секцию, в секцию: [PLAYER].
06.Выберите нужную вам ячейку секции.
07.Например: ZONE NAME=GAN1, где: ZONE NAME= - это: ИМЯ ЗОНЫ, а: GAN1 - то самое имя текущей зоны, в которой находится или находился игрок.
---------------------------------------
08.Если вам нужно получить информацию о каком-нибудь педе, что рядом с игроком, то.
09.Подойдите к этому педу или же убедитесь в том, что вы находитесь не так далеко от него.
10.Подождите примерно 5 секунд и сверните игру.
11.Также откройте папку: cleo.
12.И также откройте файл: zonename.ini.
13.Перейдите во вторую по счёту секцию, в секцию: [PED].
14.Выберите нужную вам ячейку секции.
15.Например: ID NUMBER=22, где: ID NUMBER= - это: ID НОМЕР, а: 22 - сам ID-номер педа, рядом с которым находится или находился игрок.
---------------------------------------
16.Если вам нужно получить информацию о каком-нибудь конкретном педе, что находится либо рядом с игроком, либо достаточно далеко от игрока, то.
17.Прицельтесь в нужного вам педа, нажав на: ПКМ.
18.Подождите, удерживая педа под прицелом, примерно 5 секунд и сверните игру.
19.Также откройте папку: cleo.
20.И также откройте файл: zonename.ini.
21.Перейдите в третью по счёту секцию, в секцию: [TARGET PED].
22.Выберите нужную вам ячейку секции.
23.Например: PEDTYPE=20, где: PEDTYPE= - это: ПЕДТИП, а: 20 - это сам номер педтипа педа, в которого целится или целился игрок.
---------------------------------------
24.Если вам нужно получить информацию о коком-нибудь транспортном средстве, что находится рядом или неподалёку от игрока, то.
25.Подойдите к этому транспорту или же убедитесь в том, что вы находитесь не так далеко от него.
26.Подождите примерно 5 секунд и сверните игру.
27.Также откройте папку: cleo.
28.И также откройте файл: zonename.ini.
29.Перейдите в четвёртую по счёту секцию, в секцию: [VEHICLE].
30.Выберите нужную вам ячейку секции.
31.Например: MODEL NAME=GREENWO, где: MODEL NAME= - это: ИМЯ МОДЕЛИ, а: GREENWO - это само имя модели транспорта рядом с которым находится игрок.
---------------------------------------
32.Если вам нужно получить информацию о коком-нибудь объекте что находится рядом или неподалёку от игрока, то.
33.Подойдите к этому объекту или же убедитесь в том, что вы находитесь не так далеко от него.
34.Подождите примерно 5 секунд и сверните игру.
35.Также откройте папку: cleo.
36.И также откройте файл: zonename.ini.
37.Перейдите в пятую по счёту секцию, в секцию: [OBJECT].
38.Выберите нужную вам ячейку секции.
39.Например: MASS=150, где: MASS= - это: МАССА, а: 150 - это и есть масса объекта.
---------------------------------------
40.Если вам нужно получить более подробную информацию об интерьере, в котором находится на данный момент игрок, то.
41.Войдите в любое помещение, например в дом игрока на: Гроув Стрит.
42.Подождите примерно 5 секунд и сверните игру.
43.Также откройте папку: cleo.
44.И также откройте файл: zonename.ini.
45.Перейдите в последнюю по счёту, самую нижнюю секцию, в секцию: [INTERIOR].
46.Выберите нужную вам ячейку секции.
47.Например: NAME=CARLS, где: NAME= - это: ИМЯ, а: CARLS - это и есть само имя интерьера.
48.Вся остальная информация, обо всех остальных ячейках секций, изложена детально на скриншотах.
=======================================
Клавиши управления и ваши действия, дополнительно: (по желанию, если нужно)
01.Если нужно вам нужно получить конкретно имя модели: педа, объекта, оружия игрока или педа то и это не составит большого труда.
02.Просто, всего лишь на всего, надо будет запустить: Sanny Builder, нажать на "Создать файл".
03.И в первой же строке прописать или вставить скопированный: ID-номер педа, объекта или же оружия игрока или педа.
04.После чего выделить его и нажать на: Ctrl+Alt+H и имя модели, сразу же отобразится заменив его ID-номер модели.